Guides
The Shortwave MethodCustomize your ShortwaveThe Shortwave AI AssistantCollaborate with your teamBillingSecurity & PrivacyMigrations
Migrating from GmailMigrating from SparkMigrating from SuperhumanReferences
SearchKeyboard shortcuts & commandsSupported browsersHow-tos
Use Shortwave with other email providersUnified inbox via forwardingManage multiple accountsSignatures in ShortwaveInstall Shortwave's PWADefault email appEnable push notificationsTroubleshoot push notificationsManage auto-apply labelsIntegrate Shortwave with your CRMUsing MCP with ShortwaveMake the most of your quotaTroubleshoot email syncing issuesDownload EML fileGoogle Advanced ProtectionImport full historyBefore you contact supportUpgrade, downgrade, or delete accountCustomize your Shortwave
Your inbox is critical for getting important work done, but it's hard to separate the signal from the noise when you’re bombarded by project updates, client inquiries, and promotional emails all in the same place. Important messages from high-priority contacts can get buried under a mountain of less critical emails, causing delays and missed opportunities.
Shortwave's powerful customization features are here to rescue you from this chaos. In this guide, we'll dive into how you can tailor Shortwave to your specific workflow, whether it's creating dedicated Inbox Splits for high-priority clients, bundling for easy bulk actions, or setting delivery schedules to control when emails hit your inbox. With real-world examples and step-by-step instructions, you'll learn how to transform your email management, ensuring that you never miss an important message again.
Inbox Splits
Bundles & delivery schedules
AI filters
Auto-apply labels
App layout
Notifications & other settings
Common questions
Focus and prioritize your inbox with Splits
Critical emails from customers, investors, and press can get buried under SaaS updates, newsletters, promotions, and spam. Inbox Splits combat this problem by letting you divide your inbox into focused tabs. They allow you to handle different types of emails at different times, keeping important Splits at inbox zero while skimming less critical ones periodically.
Configure Inbox Splits
Splits are customizable via Settings > Inbox Setup > Splits and can be defined by importance, labels, senders, and additional complex search queries. Splits are backed by Shortwave’s best-in-class search infrastructure, allowing you to create all sorts of specific Splits based on a wide range of criteria. Label-powered splits are particularly powerful since you can use Gmail filters or Shortwave’s auto-apply rules to label emails automatically. Additionally, you can manually move emails between Splits via drag-and-drop, making it easy to manage your inbox.
Some of the most popular Inbox Splits include:
- Important & Other – for separating the signal from the noise
- SaaS notifications – to keep Asana, Github, Notion, etc., from cluttering up your inbox
- Per-customer – for consultants who want to focus on one customer at a time
- Newsletters & Promotions – so you can read them on your own time
- Workflow-specific – using custom queries to streamline specific business processes
To reduce visual distractions, there are also per-split settings to hide empty Splits and automatically bundle emails in a split by sender, or disable bundling if preferred. This allows you to create many Splits for specific types of emails without overwhelming yourself with a ton of empty tabs and long lists of email threads.
Splits work to enhance Shortwave’s other key time-saving features, like stars, todos, bundles, and even our AI Assistant. Each split has its own Starred section for tracking high-priority emails. Todos let you group emails from different Splits, add notes, and prioritize tasks.
Shortwave’s AI Assistant can also help you get high-level summaries of entire Splits by shift-clicking to select all threads in a split and asking the Assistant to summarize the email threads.
Streamline triage with bundles & delivery schedules
Bundles are Shortwave’s not-so-secret weapon for conquering email overload. Bundles make it easy to take bulk actions by grouping related email threads together as a single item in your inbox. You can snooze, delete, or mark an entire bundle done. This way you can quickly dismiss several emails with a single click or keystroke.
To streamline things further, you can also set delivery schedules. Delivery schedules allow you to control when emails enters your inbox, so you're actually ready to handle them when they arrive. Now, instead of being constantly interrupted during the day by non-urgent emails, you can have them arrive all at once at times you choose throughout the day or week.
Enable bundling
Bundles are the best way to streamline your inbox and make email management a breeze in Shortwave. There are several types of bundles you can create in Shortwave via Settings > Inbox Setup > Bundles & delivery schedules.
- Built-in label bundles: There are labels defined by Shortwave that you can enable bundling for, like Newsletters, Promotions, and Travel
- Custom label bundles: Bundle together threads with custom labels you created
- Contact bundles: Bundle together all messages from specific senders, mailing lists, and channels
Set delivery schedules
Shortwave lets you set delivery schedules so you can defer when different types of emails arrive in your inbox. Delivery schedules are great for time-boxing triage and batching your email workflow. You can configure any label or contact to have a delivery schedule in just a couple of clicks from Settings > Inbox Setup > Delivery schedules. Simply add a label or contact and then choose your preferred schedule from the drop-down.
And for those emails that you never want to see? Use Settings > Filters > Skip Inbox to automatically mark these emails as done so they skip your inbox. You can always reference these threads again via search.
💡 A settings configuration example
Shortwave's bundles, delivery schedules, and todos all work together to help you cut your inbox down to size. Here's an example of how you might use them in practice. Imagine you have five emails from customers labeled “Clients” you’re waiting on responses for, three emails about your upcoming feature launch, and six newsletters from throughout the week that you’ve been meaning to read (but haven’t gotten to yet). Instead of leaving those 14 emails around taking up precious space and mental capacity, here’s how you can streamline your Shortwave setup:
- Enable bundling for your "Clients" label to group them all together, then snooze the entire bundle while you’re waiting for replies to keep your inbox focused
- Set a delivery schedule for the built-in “Newsletters” label to have them arrive on Saturdays at 8am. This will minimize mid-week distractions and allow the newsletters to enter your inbox when you’re actually ready to read them.
- Multi-select the email threads related to the launch and create a todo to group them together for better organization and context to handle next steps
Filtering your inbox with AI
AI filters let you organize emails automatically using natural language descriptions, traditional search queries, or a combination of both—creating an inbox that manages itself.
Set up filters to automatically:
- Apply custom labels
- Archive low-priority messages
- Mark emails as important or unimportant
- Star key messages
- Update your todo list
- Delete spam and junk
You define the rules once, and Shortwave's AI understands the context of each incoming email to apply your custom logic instantly.
Examples that adapt to your workflow
Triaging customer support – "Include emails about billing issues, payment problems, or discount requests" → label Billing Support
Clearing clutter – "Include cold sales emails, generic marketing blasts, and promotional emails" → archive
Surface what matters – "Include emails about product exploration, new UI design, or product-related discussion" → mark as Important.
💡 Pre-built filters for common workflows
- Needs Action identifies emails requiring your engagement
- Cold Outreach catches unsolicited sales emails
- FYI recognizes informational emails that don't need action
- Travel organizes all your travel-related communications
- Finance categorizes financial emails, budgets, and reports
- Purchases groups your purchase confirmations and receipts
Build powerful workflows with custom Inbox Splits
AI-labeled emails seamlessly integrate with Inbox Splits to create focused workspaces based on these labels. This allows you to create dedicated views for specific types of emails – like customer support issues or urgent action items.
Test and refine your filters
To ensure everything works perfectly, select a few sample emails (hold Shift to multi-select), click the three dots menu, and select "Reapply filters" to see exactly what actions the AI takes and why. This makes it easy to fine-tune your filters until they work exactly how you want.

Go beyond filtering with Tasklet
Want to take action on emails, not just sort them? Our sister product Tasklet can automatically draft replies, add team comments, or connect to 3,000+ apps when emails match your criteria.
Auto-apply labels in one click
Labels are a familiar tool for organizing information in many email clients and SaaS tools. In Shortwave, labels are not just for identification and storage—they're a powerful feature that can be automatically applied based on senders and fine-tuned with Gmail filters. This unlocks a suite of customization options, including delivery schedules, bundling, push notifications, and more.
You can set labels to be automatically applied or removed on a per-sender basis. Configure them once via Settings > Filters or the label picker, and let Shortwave handle the rest.
💡 An auto-apply label example
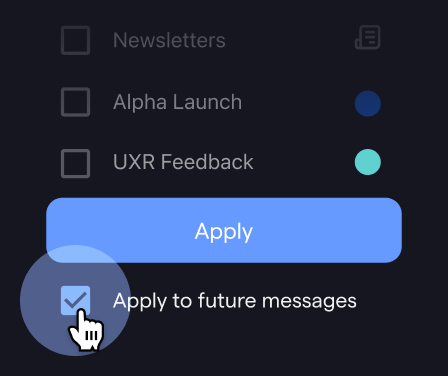
If you get an email from flights@google.com, you might want this to always get labeled as Travel. Go to the label picker, ensure the auto-apply checkbox is enabled, and click Apply. Now, every time you get an email from flights@google.com it will automatically be labeled as Travel.
You can view and manage the list of auto-applied senders for a label by navigating to Settings > Filters and clicking “# senders” listed under the Auto-apply rules column.
Optimize your app layout
You can customize your Shortwave experience with three inbox layout options via Settings > Inbox setup > Layout:
- Default: A responsive layout that is optimized for any screen size (recommended)
- Side panel: See your email list and the selected email side-by-side
- Fullscreen: Focus on one email at a time with a distraction-free view
Enable notifications for important emails
Shortwave comes with a highly configurable set of push notification controls that you can customize by label or sender. You can opt to turn push notifications on for only those particularly high-priority projects or individuals. Turning off unnecessary notifications helps reduce distractions and gives you more uninterrupted focus time to get deep work done.
Personalize further in Settings
Ready to transform your inbox into a space that truly reflects you? Dive into your Shortwave settings to explore all of the personalization tools available to fine-tune your inbox. Experiment with new accent colors, customize your swipe actions, and configure bundling to create the perfect setup that makes you feel like you’re ready to get stuff done.
While you’re there, don't forget to check out your AI Assistant personalization settings and see our guide on how to get the most out of the world’s smartest AI Assistant.
Common questions about Splits, labels, and organization
Why don't I see any emails in my Split?
Splits only show emails that are currently in your inbox. If an email has been archived (marked done), it won't appear in any Split, even if it matches the Split's criteria. To find archived emails, use search.
What is "Other"?
"Other" is the default catch-all Split. Any email in your inbox that doesn't match the criteria of your other Splits appears here. You can reduce what lands in "Other" by creating more specific Splits.
Does marking an email "Done" mark it as read?
No. "Done" archives the email (moves it out of your inbox), but it does not change the read/unread status. If you want to mark an email as read, use the keyboard shortcut or right-click menu.
How do Splits relate to Gmail labels?
Splits and labels are different things:
- Labels are tags applied to email threads. They sync with Gmail and can be used to organize emails across your entire mailbox.
- Splits are inbox views powered by search queries. A Split can filter by label, sender, or a combination of criteria.
You can create a Split that shows all emails with a specific label, but the Split itself is not a label.
Up next → Shortwave’s AI Assistant guide
Guides
The Shortwave Method
Customize your Shortwave
The Shortwave AI Assistant
Collaborate with your team
Billing
Security & Privacy
How-tos
Use Shortwave with other email providers
Unified inbox via forwarding
Manage multiple accounts
Signatures in Shortwave
Install Shortwave's PWA
Default email app
Enable push notifications
Troubleshoot push notifications
Manage auto-apply labels
Integrate Shortwave with your CRM
Using MCP with Shortwave
Make the most of your quota
Troubleshoot email syncing issues
Download EML file
Google Advanced Protection
Import full history
Before you contact support
Upgrade, downgrade, or delete account